A Work Breakdown Structure (WBS) is a decomposition of all the work necessary to complete a project which is arranged in a hierarchy and constructed to allow for clear and logical groupings, either by activities or deliverables. A Work Breakdown Structure is a critical tool for organizing work, building realistic schedules and cost estimates, and controlling, which is a grouping of project work elements to organize and subdivide the total work scope of a project.
Steps to develop a Work Breakdown Structure
The steps below outline the major steps to take in creating a Work Breakdown Structure.
- Define the scope of the project on the first level of the WBS
- Project management deliverables should be outlined at level two of the WBS
- Decompose project deliverables into work packages, to a level that can be scheduled, cost estimated, monitored, and controlled
- Apply the WBS to schedule development and resource assignment
- Apply the WBS to, as needed, change control, risk, budget, cost, and communication management, etc.
Creating a Work Breakdown Structure
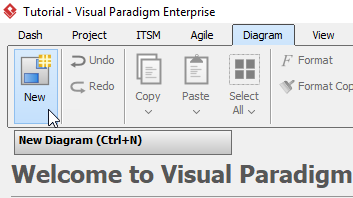
- Click Diagram > New form the toolbar.
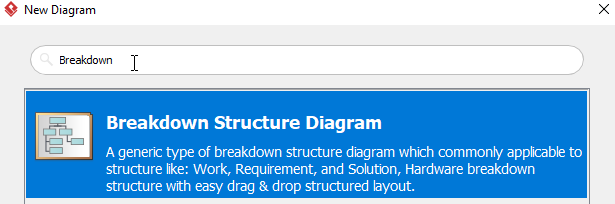
- In the New Diagram window, select Breakdown Structure Diagram, then click Next.
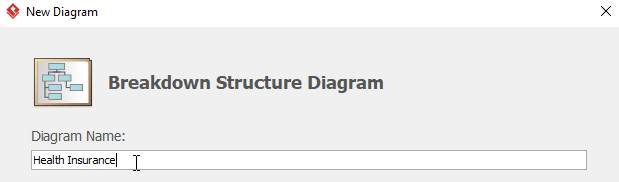
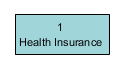
- Name the diagram then press OK. We will name the diagram Health Insurance in this tutorial.
- You will see a diagram with only one element called Health Insurance:
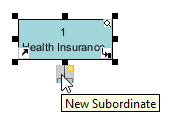
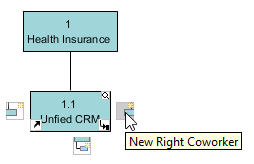
- Move the cursor to the element Health Insurance, then click the resource icon New Subordinate.
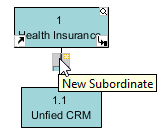
- Double click the element with ID 1.1, and rename the element to Unfied CRM. You can add a coworker for element Unfied CRM by:
- Repeating step 5,
OR
- Moving the cursor to the element Unfied CRM, then click the resource icon New Left Coworker or New Right Coworker.
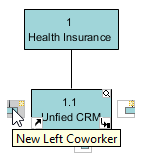
- Repeat step 6 for more coworkers of element United CRM.
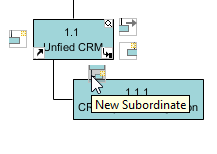
- To create a subordinate of element United CRM, move the cursor to element United CRM, then click the resource icon New Subordinate. Rename the new subordinate to CRM System Integration.

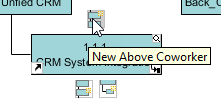
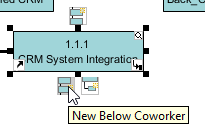
- To add a coworker for CRM System Integration, there are two different methods:
- Repeat step 8,
OR
- Move the cursor to element CRM System Integration, then click the resource icon Create Above Coworker or Create Below Coworker.
- Repeat step 8 and 9 for other elements and their subordinates.
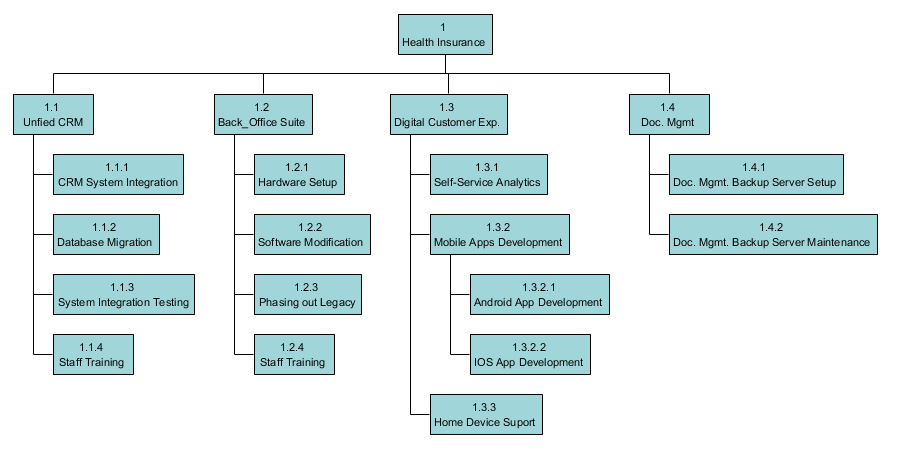
- You will get something similar when you finish your diagram: